Protect Yourself
Know Your Rights!
In moments of crisis, speed and clarity are everything. Whether you’re facing unlawful detainment, harassment by government agents, or an ICE raid, one tap should be enough to notify allies, send your location, and document what happens next. This guide walks you through building a powerful emergency shortcut on both iOS and Android that does precisely that.
Why These Shortcut Tools Matter
This isn’t about paranoia. It’s about preparedness. Civil liberties are under siege in many communities, especially for immigrants and activists. What you build here is a lifeline—a silent witness, a legal ally, and a warning flare rolled into one.

Part 1: Building the Shortcut on iOS
Apple’s Shortcuts app lets you create powerful automations. Here’s how to build your “Emergency Alert” shortcut.
Before You Start
- Install the Shortcuts app if it’s not already on your iPhone
- Have a list of emergency contacts (family, lawyer, friend, etc.)
Step-by-Step
1. Open the Shortcuts App and tap the “+” to create a new shortcut.
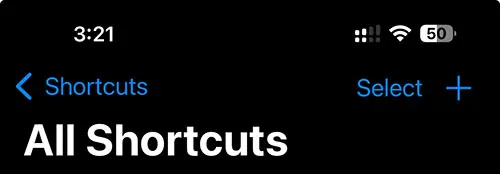
2. Name Your Shortcut
• Call it “Emergency Alert” or something easy to remember
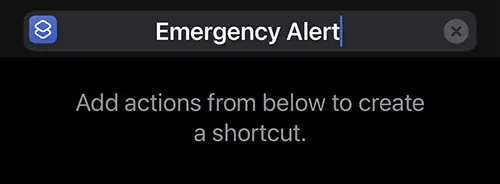
3. Add Action: Get Current Location
• Tap “Search Actions”
• Search for “Location” and choose “Get Current Location”
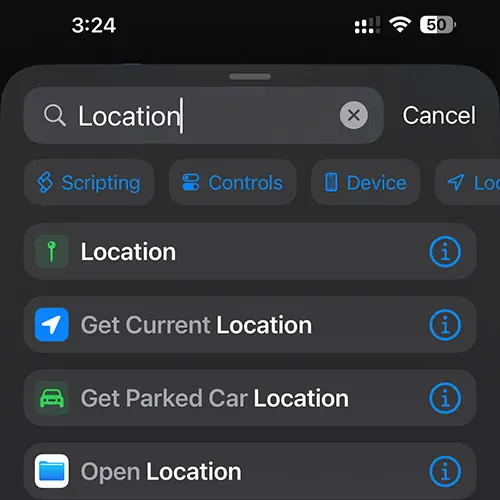
• Tap the down arrow and change “Nearest Hundred Meters” to “Nearest Ten Meters.”
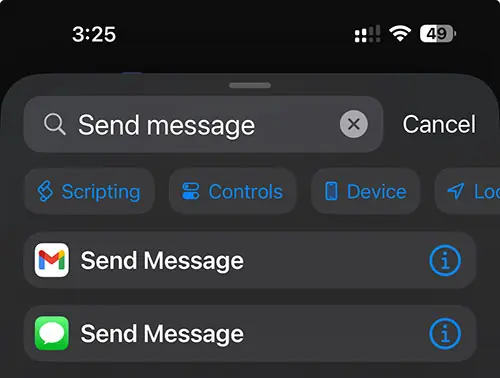
4. Add Action: Send Message
• Tap “Search Actions”
• Search for “Send Message”
• Type a message like:
• “I need help. I am being approached by authorities. Here is my location:”
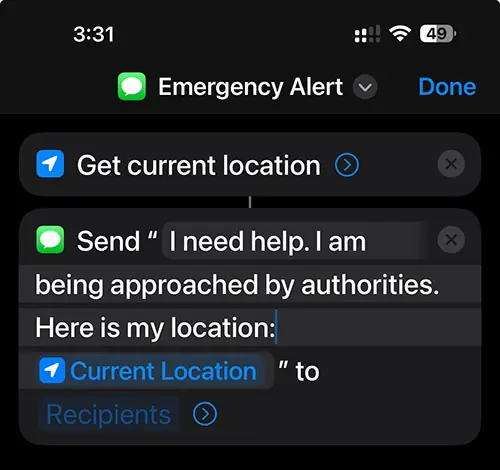
• Tap the blue word “Recipients” and add all of the people who should get the alert

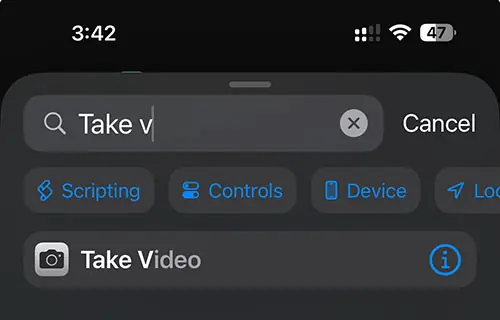
5. Add Action: Record Video
• Tap “Add Action”
• Search for “Take Video”
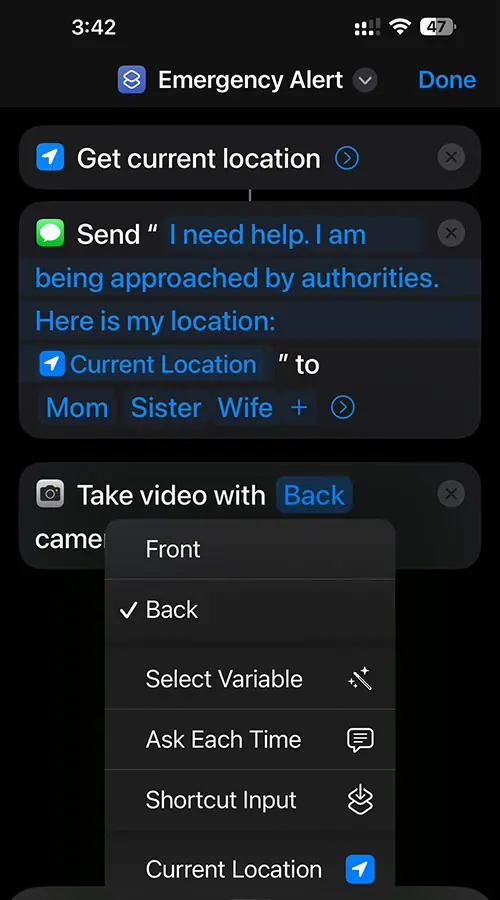
• Choose Front Camera (or Back if you prefer)
6. Add Action: Set Volume
• Search for “Set Volume”
• Set Volume to 100%

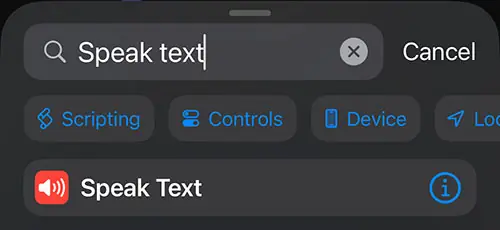
7. Add Action: Speak Text
• Search for “Speak Text”
• Add Text: “I do not consent to a search. I want to speak to a lawyer.”
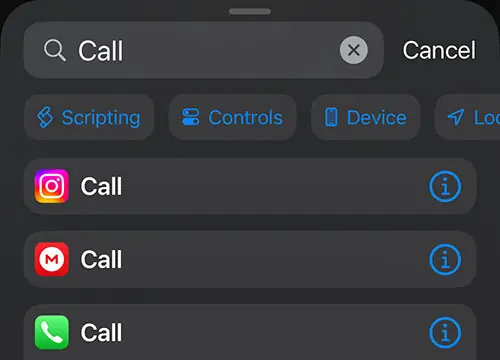
8. (Optional) Add Call Action
• Search for “Call”
• Choose your lawyer, emergency contact, or 911
9. Add to Home Screen and/or Back Tap
• Tap the down arrow at the top next to “Emergency Alert”
• Then tap “Add to Home Screen”
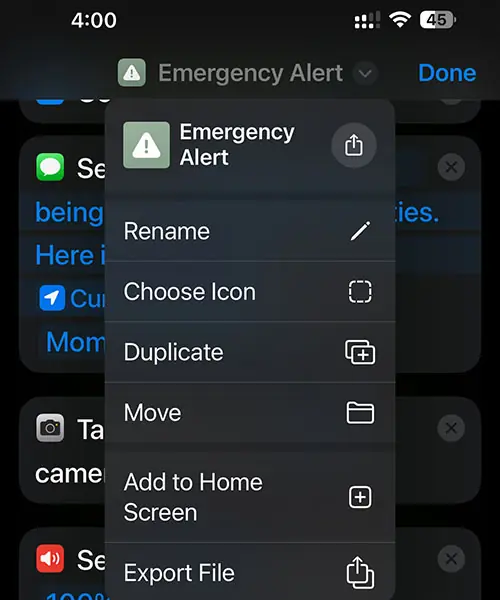
• Note: When adding to your HomeScreen you can use a photo instead of an icon:
10. (Optional) Change Icon and Color
• Tap “Choose Icon”
• Choose the color and icon you want.
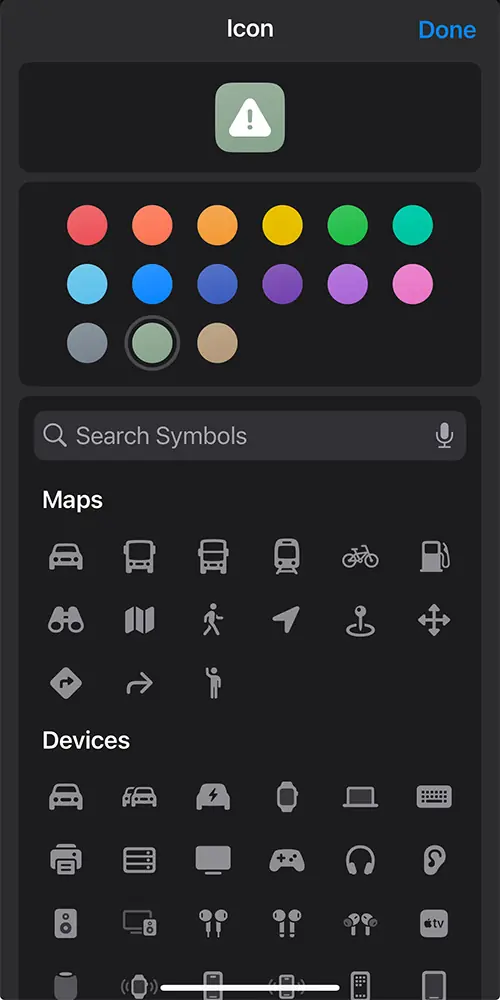
11. (Optional) Add Back Tap Activation
• Return to your HomeScreen
• Go to Settings > Accessibility > Touch > Back Tap
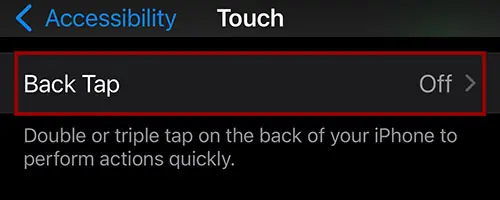
• Choose “Double Tap” or “Triple Tap”
• Select the “Emergency Shortcut” you created on your HomeScreen

• Tap “+” → “Create Personal Automation”
• Choose a trigger: App Open, Back Tap, NFC, or Button Press
• Select your shortcut as the action.
• Scroll to bottom and toggle “Ask Before Running” OFF
• Confirm when prompted
Part 2: Android Options
Android doesn’t have a native Shortcuts app like iOS, but you have powerful tools:
Option 1: Tasker (Power Users)
1. Install Tasker from Google Play
2. Create New Profile
• Trigger: Event > UI > Button Pressed (e.g., Volume Up 3x)
To do this, tap “+” > Event > UI > Button > Volume Up. Choose how many times to press.
3. Create Task
• Action 1: “Get Location”
• Action 2: “Send SMS”
• Mesage: “I need help. I’m being approached by authorities. My location: %LOC”
• Add: contact numbers
• Action 3: Start Video Recording (may require plugin or root)
• Action 4: Set Volume to 100%
• Action 5: Text-To-Speech: “I do not consent to a search. I want a lawyer.”
• (Optional) Call emergency contact or legal hotline
4. Save your Profile and Add a Shortcut to the Home Screen
• Long press the home screen, choose “Widgets”
• Find Tasker, and drag your shortcut onto the home screen for fast access.
5. Permissions Reminder
• Ensure Tasker has permission to access:
• Location (set to “Allow all the time”)
• SMS
• Microphone (for TTS and video)
• Notifications (if using plugins)
6. Test It
• Run the shortcut in a controlled test.
• Make sure the location, SMS, and speech actions execute properly.
• Adjust for your specific device quirks.
7. Share It
• You can export your working shortcut and share the .xml file with others.
• (Don’t include personal contacts — use placeholders like “Mom” or “Lawyer”).
Option 2: Samsung Modes & Routines
1. Open “Modes & Routines”
• Go to Settings → Modes and Routines
• Tap the “Routines” tab at the bottom
2. Create New Routine
• Tap the “+” icon in the top right to begin
3. Set Trigger
• Tap “Add Condition”
• Choose one of the following triggers:
• App opened (select an app you don’t normally use)
• Button press (only works for Side Key on some models)
• NFC tag scan (if you carry a keychain tag or sticker)
4. Set Actions
• Tap “Add Action”
• Choose the following actions:
• Send Message
• Message: “I need help. I’m being approached by authorities. My location: [autofilled]”
• Add emergency contacts
• Make Phone Call
• Select a lawyer, family member, or emergency number
• Set Media Volume
• Set to “100%”
• Open Voice Recorder or Camera
Note: This may not auto-record — you may need to tap “Record” manually
• Speak Text or Show Notification
• Text: “I do not consent to a search. I want a lawyer.”
5. Name Your Routine
• Choose a subtle name like “Tools” or “System Boost” so it doesn’t attract attention
6. Add to Home Screen
• Tap the 3-dot menu inside your routine
• Choose “Add to Home Screen”
• Optional: Add it to Lock Screen widgets if your device supports it
7. Permissions Reminder
• Go to App Info for Modes & Routines and allow the following:
• Location access
• SMS and Call permissions
• Microphone access
• Notifications (if using alerts or message previews)
8. Test It
• Run a full test in a safe environment
• Verify the message sends, call connects, and volume adjusts
• Ensure your trigger works correctly and reliably
9. Share It
• Take screenshots or export the routine using Samsung Smart Switch
• Use placeholder names like “Lawyer” or “Friend” instead of personal contacts
Want to contribute your working version?
Drop us screenshots or export your Tasker profile and send it in.
We’ll credit contributors who help build out this guide.
Part 3: Best Practices
- Keep Contacts Updated – Make sure your emergency list is current
- Test Monthly – Don’t wait until you need it to find out it’s broken
- Cloud Backup – Sync recorded videos to iCloud, Dropbox, or Google Drive
- Discreet Messaging – Use code words if you fear being monitored
- Multilingual Setup – Create Spanish or other language versions
- Use a Quick-Access Case – Avoid biometric locks if possible
Limitations
- iOS cannot Auto-send WhatsApp or Signal (those apps block automation)
- Some Android Devices Block Recording When Locked
- Auto-calling 911 Can Be Risky – Use with care
- Permissions Must Be Granted in Advance
Final Thought
We live in unpredictable times. With one shortcut, you empower yourself to respond with speed, document with clarity, and signal to others that you will not be silently swept away. Tech doesn’t have to serve surveillance. Sometimes, it serves justice.
With that being said, it also pays to know your rights.
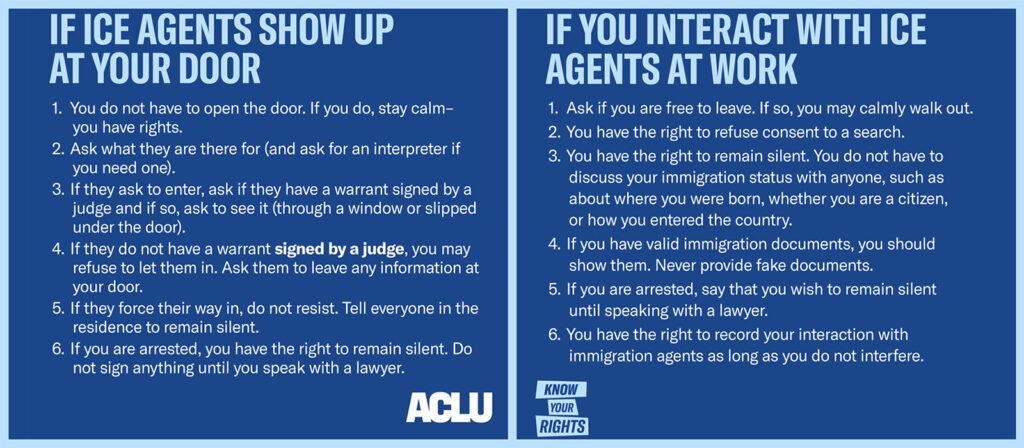
Make the shortcut. Share it with your community, and never let silence be the end of your story.
Support The Virtus Press
The Virtus Press is committed to bold, honest commentary that challenges the left and right alike. If it needs to be said, we say it.
If you enjoy our content, please consider donating to help us continue doing what we do best.
Your contributions allow us to sustain and enhance our mission.
Follow me on Bluesky for updates on this and other topics that shape our nation’s identity.


